Showing posts with label prop tutorial. Show all posts

Sunday, January 11, 2015

Mini Hershey Bar Made from Hershey Candy Wrappers!

Another Trash to Treasure Barbie Miniature Project

This was a fun and easy project! Save those wrappers!

I used a Hershey's Mini to make a Barbie sized Hershey Chocolate Bar.

Instructions

1. Eat chocolate.
2. Flattened wrapper. Cut away all the silver part. Then cut the rest in half.
3. Cut a piece of foam or thick cardstock, measured to the size of the lettering on the wrapper. 
4. Cut and glue to foam or thick cardstock. Cut excess from the back. 
5. Bend the edges for a realistic look. 


Monday, April 29, 2013

Number Prop Tutorial

I wanted to make a number prop for my daughter's 2nd birthday photoshoot  last year.  Unfortunately for me, I didn't decide until two days before!

I made a simple prop using stuff I purchased at the dollar store: Foam board and streamer!  

Since then, I have used this technique on other stuff, including wrapping presents!

Genevieve as The Princess & the Frog
2nd Birthday Photoshoot

Photography by ValentinPhotography.com


Total cost:  $3!


Supplies:

1 foam board 

4 rolls of streamer (sold 2 per pack)
Scissors

Glue stick

Step 1:
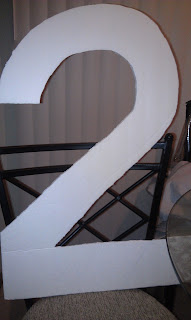
I stenciled out the shape of the number I wanted.  I made it the size of the board, so it was a good size.  My number was basic, but if you want something fancy, you can look for a font you like and make it whatever shape you like.


Step 2:  
I cut out the number using scissors.  It doesn't have to be perfect, the streamers cover any inperfections.

Step 3:  
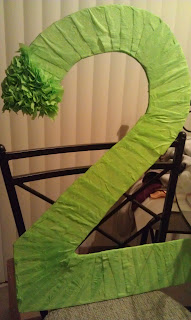
I covered the number front and back with streamer.  It was glued together using a basic Elmer's glue stick.


Step 4:
This is the most tedious task.  I suggest cutting as many squares ahead of time, cutting the squares about an inch in size.  Pinch the middle of the squares and make part of the pinch a little flat to glue it to the board.


Fluff up any smashed pieces, and it's done!

This is a fun technique to use for wrapping presents as well!